# webchem
# -Benutzerhandbuch-

# Introduction
This user manual is intended to enable you to make optimum use of all the functions of webChem.
The manual is divided into three sections:
First steps:
Everything is explained here, from registration to language settings and logout.Basics:
There will be an overview of the general structure, operation and personal User settings given.Modules: Individual modules of the program are described here and their How it works explained. Furthermore, there are step by step instructions for important processes described.
# First steps
Before you start using webChem, you must first register and log in.
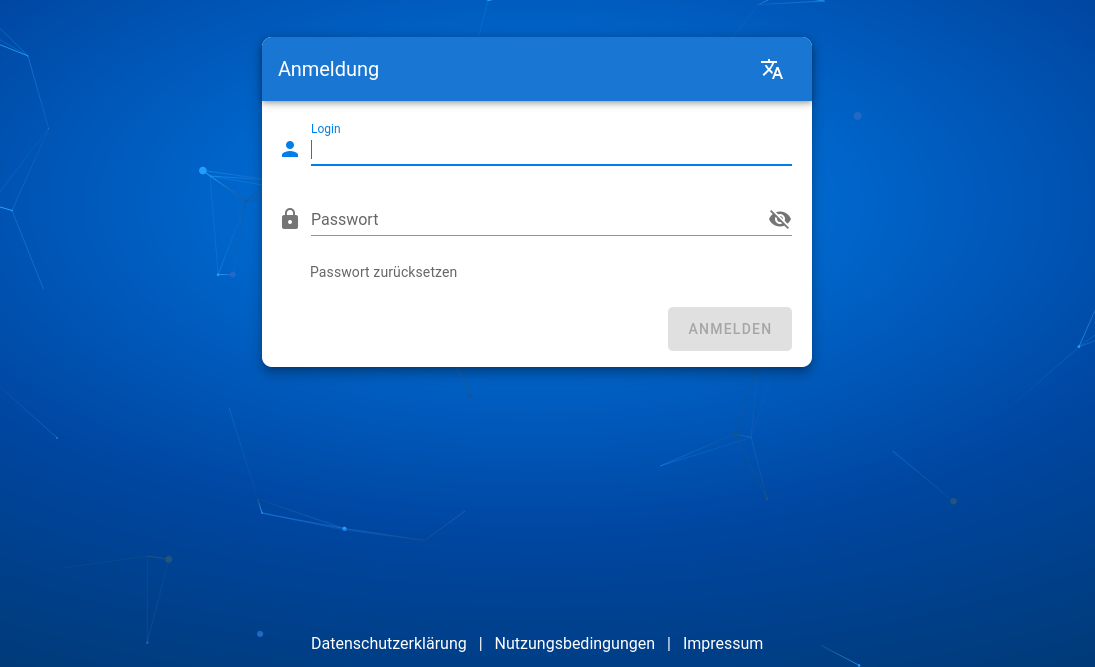
# Language setting and registration
To select the language you want, click in the
Registration box on this button:
Use this to set the language,
in which you use webChem. Click on the “Register” button,
Enter your details here (email, first name, last name) to create an account.
# Login, forgot Password, Logout
To log in, please enter your details in the appropriate fields
you provided during registration. When you log in for the first time, you must use the “webChem
Accept “Terms of Use”.
If you have forgotten your password, click on the corresponding field. Well
You can reset your password using your registered email address then log in as usual.
To log out of the system you can select this icon at any time:![]()
It's in the bottom left bar.
# Basics
In order to enjoy the best possible working experience, it is possible to use the user interface to personalize.
# General structure of the user interface
After logging in, the first thing you will do is go to the dashboard.
This serves as a general overview. There will be important modules, such as
“Users, Molecules, Knowledge Manager, Molecule Editor, Molecule Sessions,
Knowledge Level Classes, Knowledge Level, Knowledge Level Editor and Settings” for the
Quick access is displayed. In Figure 2 you can see that on the left
There is a toolbar on the edge of the browser.
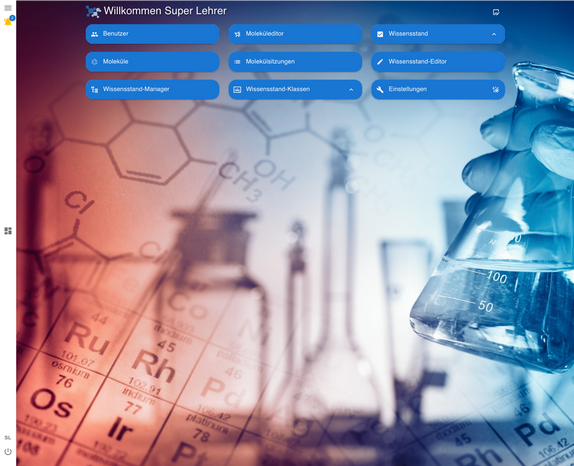
Using the toolbar icons, you can go to the “Main Menu” and the “Dashboard”. to the “User Profile” and “Logout”. You can also get yours here View “Notifications”.
# Add/remove favorites
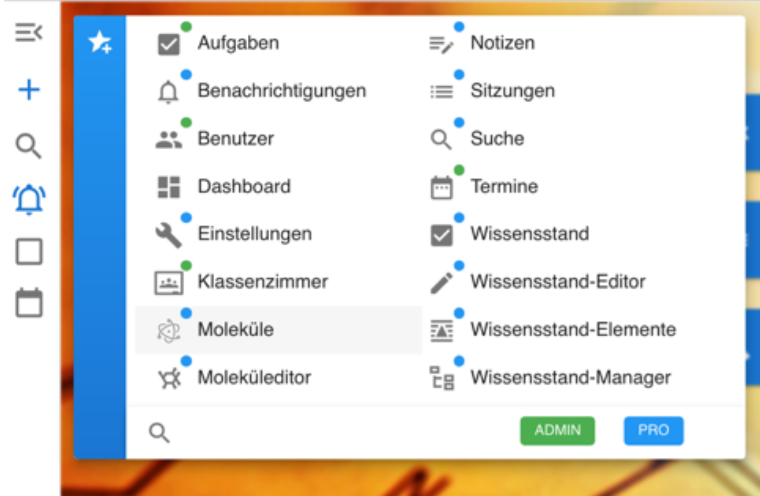
“Main menu” > “Set favorites” select the box for the respective module to add a favorite to the bar. Select an already selected box (colored box) again to select a favorite****remove
# Add/change personal information
In order to view your specified data such as first name / last name / abbreviation, either:
- You call up your user profile from the left bar (toolbar) and click then your profile
or
- go to the “Settings” module and select “User Account”. If you would like to make a change to this, select the appropriate field with a double click.
Additionally, you can add an email address, a messenger, a telephone number and an address where you can be reached. For these activities You can use the icons in the lower right half of the window Disposal.
# Change password
If you would like to change your password, select the module “Settings” and then “Security”. In the window you can see below Select “Change password” to set up a new password.
# User interface personalization
To personalize the Userinterface, select the Settings module
out of.
A window will now appear in which you can select various aspects of personalization
Edit like “Colors” and “Region”.
Select “Factory Reset” to reset all your
Delete personalizations.
# Colors
In the “Colors” section of the personalization, you can change the layout colors of different Areas of webChem set. To do this, click on the one you have selected Select the area and set the desired color.
# Region
Within the “Region” menu item you can Language and time settings make. Additionally you can set the number and time format as well as the Change unit system by selecting the respective points.
# Modules
A description of the modules integrated in webChem and their operation.
# Notifications
Your notifications will appear here. You have the option Have notifications sorted by modules or creation times and the Select the period to be displayed. You can also view archived notifications.
# User
The user area displays all users that are linked to you. As
“ADMIN” here you can find information such as first name, last name, email address,
Abbreviation, assigned role, personal description and language view.
You can also manage, create, or **users associated with you
delete.
To create a student or class, select in the top bar
either “add new student” or “add new class”.
You have the option to select “classes” and the individual members
to display. You can also do all of them regardless of the individual classes
Have students displayed in the “Overview”.
- To add students to an existing class, select the “Classes” area at the top right. You will now see a list of all of yours created classes. To select a class, click on it. Choose Now select “edit” and add an existing student by clicking on the button.
# Add new class
You can create a class with any number of students by
Select “add new class”. You must give the class an abbreviation and a
Give names to be able to create them. Optionally, give this a description
so that class members can get more information.
You have the options to add.
In the “Multiple” area you can add a desired number of students at once
add to the class. To do this, first select the desired number and enter
then enter a user account template, e.g. User. The system then creates
automatically the desired number of user accounts, e.g. User 1, User 2,
User 3. You can set a uniform password for all user accounts
Create class members by entering the desired password into the
specified area. If you have a separate password for each class member
If you want, select “Generate password” and the system will create it automatically
different passwords for each class member.
# Add existing students to a new class
You can add existing students to a newly created class add. To do this, select “Existing” and then those that have already been created students.
# Dashboard
The dashboard provides an overview of everything available to you Modules. By selecting the desired field you will go directly to the module. You can also select which modules using the “Settings” button displayed on the dashboard, change the background and view.
# Molecules
Here you will find an overview of all molecules you have created or shared with you. There is also the option to search for molecules, enter the
Enter the name you assigned into “Search”. Furthermore, you can already
“Add molecules selected in the overview to favorites”.
In addition, you can manage your molecules, select for this
Molecule/molecule names. This opens in a window and you have
different options for interaction.
You can rename the molecule by clicking on the name/description
select with a double click.
Below the window you will find the option, if you select this you will be taken to the functions of the molecule editor and you can continue working on the molecule or editing it. If you make changes, select “Save” after the editing process. If you want to cancel the changes, select “Cancel”.
Above the molecule editing window you can do various
Use quick selection actions. The following are available to choose from:
"Add description",
“Set favorites”,
"Comments",
„Copy“,
„Delete“,
„Add tags“,
„QAdd users“,
„Close“.
You will also be shown the creation period. Also will be yours
Information about a molecule shared with you is displayed (date of creation,
Author, partner).
You can do this via the ribbon which is located in the top left corner
Ability to filter the display. You can choose whether you only want “2D”, “3D” or
“All” molecules are displayed. Furthermore, the molecules can be sorted by “title”
or “Creation time”, select one of the displayed symbols
out of. You can use the additional “Filter” to change the filter options
“created by me”,
„ Shared“ or
"shared with me"
# Molecule editor
With the help of the molecule editor you can create, edit and 2D as well as 3D molecules perform quantum mechanical calculations. The students have them Possibility to make different molecules appear visually and on or with them to work.
# General functionality
To open the molecule editor, go to either the main menu or to
Dashboard and select Molecule Editor.
To draw a chemical compound or a molecule, click in the work area with the left PC mouse button or on your touchpad and hold the button
Press and drag the mouse cursor in a direction to create a connection
draw.
To delete an item, right-click the desired object
Mouse on. Another way to delete elements is to select “Delete” in the ribbon and then tap the desired elements. If you want to delete multiple items at once, first select the “Lasso”, circle the desired area and proceed as described above. You can center your drawn molecule at any time by clicking “center”
Select in the right ribbon.
To reduce/enlarge the drawing, select either “reduce”
or “enlarge” in the right ribbon.
To reduce/enlarge the drawing, select either “reduce”
or “enlarge” in the right ribbon.
Using the “Move” point, you can change the connection lengths/angles
of your Edit 2D structure. To do this, select the symbol in the left menu item. To **(re)name a created molecular structure, click with one
Double-click the tab in the top work area of the work window
for example, labeled as 2D structure or 2D structure (3D).
To add additional text, a 2D/3D structure or a diagram,
select “Add.”
If you have created multiple tabs and want to highlight a tab with a specific structure, you can select it under Add. The tab
is then marked in color in the bar.
By selecting a desired tab, you can open the working window
including the delete created content.
# Creating a 2D molecule structure

If you have opened the molecule editor, a work window will appear in which you can create a 2D molecule structure.
You create these by either “drawing” connections yourself, “drawing an atom chain,” or inserting a “select molecule fragment.” To select any item, tap Select Items. You can now select an element from the periodic table.
If you want to replace an existing element with another, for example in a molecule fragment, first select the desired element from the periodic table. Then click on the location in your drawing where you want to replace the chemical element.
You can add different atom symbols to the molecule using the “Add Atom Symbols” feature.
Existing hydrogens are not shown. If you would like to add hydrogen atoms to the drawing, you can do this by activating the “Set hydrogens” menu item.
If you want to draw a reaction, select “Draw Reaction Arrow”
to draw a desired reaction arrow. About the point “Label
Add”, you can add text to your drawing. To do this, type yours
Enter the desired text in the field that appears and click on “ADD”. If
If you now click in the work area with the left PC mouse button, your text will appear
this place.
You can import a 2D structure by selecting “Import”.
and then choose between the options “Open molecule” or “Upload file”
choose.
ou can export a 2D molecule you have created under the point
"Export". You have different options for action: “Save molecule”,
“Export file”, “Copy to clipboard” or export as “SDF file” (a file for storing spatial data).
If you select the “Save as Image” icon, you can save your created 2D
Save molecular structure as image.
# Conversion of a 2D into a 3D molecular structure
If you want to convert a 2D structure to a 3D structure, select the
Select “Convert to 3D structure”. This can take a moment. As soon as
Once the conversion has been completed, a new tab appears in the work window with an image of your desired 3D structure.
Attention! If you make changes to your 2D molecular structure, you will then need to create a new 3D structure. Changes to the 2D structure are not automatically transferred to the 3-molecule structure.
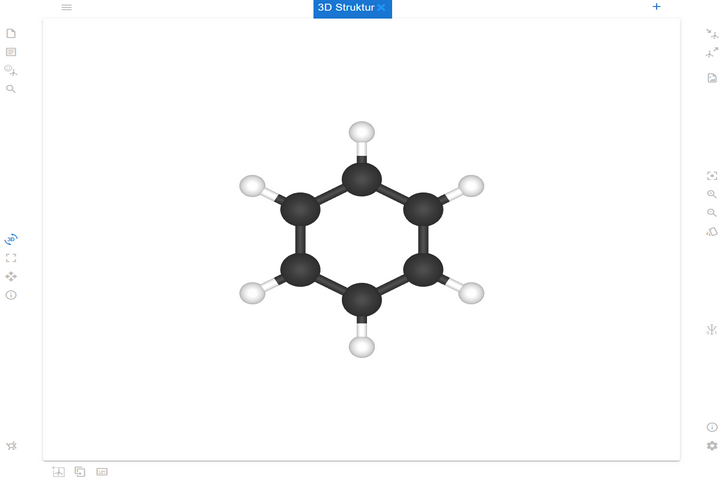
# Functions of the 3D molecule
After you have created a 3D molecule, you can use different options
to interact.
You can rotate the molecule by selecting "Rotate" and then using
Left-click the PC mouse, hold it down and move the molecule. One
Another possibility is that the molecule rotates independently. Right-click on the work area and then select “Start rotation”.
You can interact with elements in your 3D molecule by using the
Select the “Select” menu item and then the desired elements
click. You can then do this, for example, using the “Move Mode” item.
move.
Additional functions are available by right-clicking in the work area
Disposal:
- „Atomnummer anzeigen“
- „Elemente anzeigen“
- „Bindungslängen anzeigen“
- „Ladungen anzeigen „
- „Rotation starten“
- „Wasserstoff hinzufügen“
You can have your 3D molecule displayed in various options, choose
To do this, select “Select display mode” from the right menu ribbon.
Molecular information such as molecular formula and molecular mass can be found
also from the “Info” in the lower part of the ribbon.
# Quantum mechanical calculations on the 3D molecule
Via the menu item “Quantum Mechanical Calculations” in the right
Ribbon allows you to perform quantum mechanical calculation of the molecule.
You can
- „Geometrie optimieren“: die Geometrie des Moleküls optimieren
- „Konformation berechnen“: die Konformation berechnen
- „UV-Spektrum berechnen“: ein UV-Spektrum des Moleküls berechnen
- „IR-Spektrum berechnen“: ein IR-Spektrum des Moleküls berechnen
- „Rotationspotential berechnen“: das Rotationspotential des Moleküls berechnen sowie
- „pKs-Werte berechnen“: pKs-Werte einzelner Elemente berechnen.
Achtung! Um den pKs-Wert zu berechnen, müssen Sie vorher ein Element des Moleküls auswählen!
The quantum mechanical calculations are displayed to you in a diagram, which you can view via the “Diagram” menu item in the right-hand ribbon can. You have the option to “export the diagram” “to a session "to insert", "to display a data table", "to display the diagram as an image save or copy it”.
# Create 3D molecule from database
You have the opportunity to work on an already existing 3D molecule or to carry out calculations.
Open the molecule editor and add a 3D molecule. It opens up
new workspace that offers you the following options
- „Molekül öffnen“
- „Molekül importieren“,
- „Smiles Zeichenkette angeben“,
- „Molekülsuche“,
- „Koordinaten eintragen“.
# Molecule sessions
With the help of the “Molecular Sessions” module you can participate in and
stored molecules/molecule sessions. This gives you the
Ability to continue working in the molecule editor where you left off
have. Items stored in “molecule sessions” do not only refer to
individual molecules, the complete session with all tabs etc. from the molecule
Editor displayed.
To continue working on a saved session, select it from the list on the left. A window with the saved information will now appear on the right. Click on “Editor” and you will be taken to the molecule editor and can continue working.
# Wissensstand
With the help of the knowledge level editor you can
Create your learning environments.
When you select the menu item,
you will reach a new work area.
To the left of this are
different elements with which you
Design your environment. Right
you will find options with which you
- carry out a test run can and
- View settings
can do.
Below you have the option to create a new learning environment and open a created learning environment. Furthermore, here you will find the options to save the learning environment, export it or import an environment from a local storage medium.
You can add a new page with . If you have an existing page
If you want to rename, double-click to select the current name of the page
out of. To delete a page, click the X next to the page name.
If you right-click the PC mouse on the page name, the “Duplicate” options will open, allowing you to copy the page and create a new one at the same time.
# Design of the learning environment
You have the option of different task formats 3 (open and closed
tasks).
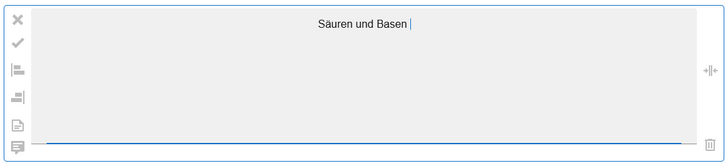
To create a task, select the corresponding icon. A window will now appear in which you can enter your desired question. You have the option to format the question according to your wishes. To do this, select the symbols above the writing bar.
Additionally, you can set various display and editing settings
which you can find in the lower part of the window. For example, you can
Set whether the task is a mandatory task.
Attention: first After a mandatory task has been processed, further tasks can be processed take place. The students cannot complete the learning environment or go to a new page until all compulsory tasks have been completed.
You can mark a task as mandatory by clicking the icon click and activate it (the icon changes color when activated). A further click deactivates this function and it is a voluntary task.To save/add the created question, select . after the Once the task has been added to the learning environment, it will appear in the desired format visible.
To delete a task, select it and click the icon below in the task field on the right.
If you want to change the position of the task, select the arrows on the right at the top of the open task field or move the task using drag and drop.
You also have the option of changing the settings you have made to others assign tasks. To do this, select “Save Preset”.
“Knowledge items”, here you can access saved items that you can then be used in their environment.
# Task formats
The following open and closed task formats are available to you:
- Textfrage

- Auswahlfrage

- Slider-Frage

- Bewertung

- Matrix

- Molekülaufgabe

(By clicking on the “Molecule Editor” button, respondents go to the Molecule Editor.)
In addition to designing different task formats, you can also use texts, images
or add molecules to the learning environment.
webChem offers the following options for this, which you can find at the bottom left of the page
Find your field of work:
- Text
You have the option of inserting text without formatting.
- Formatierter Text

With the help of this function you can insert formatted text. In the You will find various options for this in the toolbar above the writing field.
- Bild
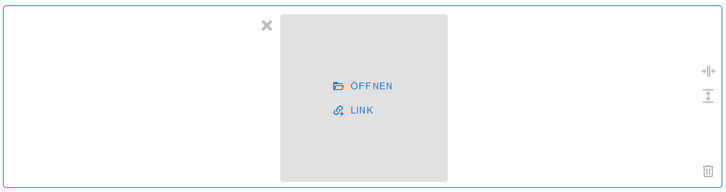
You can either import an image from a local disk, To do this, select “open”. There is also the option of taking a picture To add it to the Internet, select “Link” and enter it Enter the corresponding URL. On the right side of the window, you will find the Possibility to enlarge the image.
- 2D Struktur
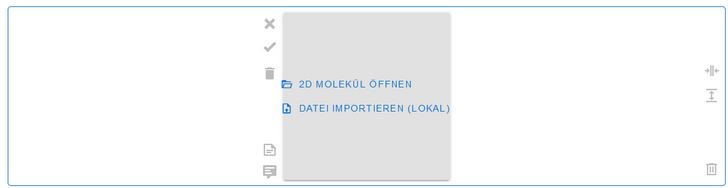
To add a 2D molecule created in webChem to the learning environment, select “Open 2D Molecule”. It will give you a list of your already Created 2D molecules are displayed from which you can select the desired molecule can choose. Does the 2D molecule to be inserted exist as a graphic on your local disk, select “Import file (local)”. On the right On the side of the window, you will find the option to enlarge the image.
- 3D Struktur

There are various ways to create a 3D structure of the learning environment
to add. You can click on “Open 3D Molecule” which you have already created
Add molecule created in webChem or under “Import file (local)”
upload a molecule from a local disk.
You also have the option of selecting a 3D molecule from a database
to select. To do this, select “molecule search” and enter the
Enter the corresponding molecule name. It will give you a list of possible ones
Molecules shown from which you can choose one.
On the right side of the window, you will find the option to view the image
enlarge.
# Knowledge elements
To view and manage your saved knowledge items, select
the module of the same name.
After opening the module, you will find a list of saved items. Around
To manage, select the desired item. It appears next to the
Listing a window in which the content of the element is displayed. To do this
edit, select. Your edited element so that the innovations can be used. You can also add “tags” to find or sort the item more quickly later. You can also assign items to groups by selecting “Add Group”.
# Create/add knowledge items
To create a knowledge item, you must use the knowledge editor
open.
- Erstellen Sie eine Aufgabe ihrer Wahl und speichern Sie diese.
- Wählen Sie „Elemente auswählen“ aus der rechten Toolbar aus. Sobald es aktiviert ist, ändert sich das Erscheinungsbild .
- Wählen Sie jetzt die Aufgabe/Aufgaben aus, die Sie Ihrer Liste der Wissensstand- Elemente hinzufügen möchten. Die ausgewählten Fragen erscheinen jetzt gelb umrandet und in der rechten Toolbar erscheint ein neues Symbol („In Sammlung hinzufügen“).
- Wählen Sie jetzt „In Sammlung hinzufügen“ aus, um das Wissensstand-
Element zu speichern.
ACHTUNG! Alle ausgewählten Aufgaben werden als ein Element gespeichert! Wenn Sie die Aufgaben als einzelne Elemente speichern möchten, wiederholen Sie den Vorgang für jede Aufgaben einzeln.
# Wissensstand-Klassen
Das Modul „Wissensstand-Klassen“ können Sie mit einem digitalen Klassenbuch
vergleichen.
Hier können Sie eine gewünschte, von Ihnen erstellte Klasse auswählen und erhalten
einen Überblick über Termine, Lernumgebungen, Test und vieles mehr.
Öffnen Sie hierfür das Modul und wählen aus der gezeigten Liste eine gewünschte Klasse aus.
Sie gelangen nun in das virtuelle Klassenbuch dieser Klasse. In der Übersicht werden Ihnen unter „in Bearbeitung“ die bereits freigeschalteten und unter „Abgeschlossen“ die abgeschlossenen Wissensstände angezeigt. Wählen Sie einen Wissensstand aus, um weitere Informationen darüber zu erfahren oder den Wissensstand zu verwalten. Dabei können Sie z.B. bereits von Schüler:innen eingereichte Wissensstände bewerten oder Schüler:innen als „Abwesend“ zu markieren.
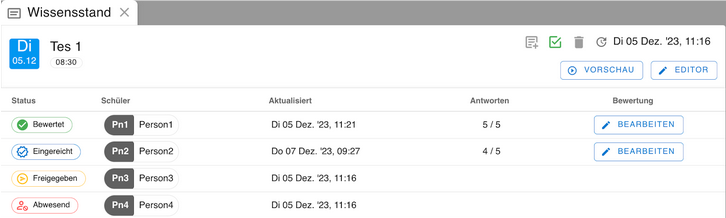
Um einen bereits erstellten Wissensstand zu bewerten, wählen Sie das Kästchen
„Eingereicht“ links neben dem Namen der Schüler:in aus. Nun erscheint ein neues
Fenster in dem Sie die bearbeiteten Aufgaben der Schüler:in einsehen und bewerten
können.
Falls Sie eine Schüler:in abwesend war, der Wissensstand aber für diesen freigegeben ist, können Sie mit den Mauszeiger auf die Anzeige „Freigegeben“ führen, nun erscheint das Auswahlfeld „Abwesend“ welches Sie auswählen können.
Neben der „Übersicht“ finden Sie den Punkt „Schüler“. Hier können Sie einzelne Schüler:innen aus der Klasse auswählen und die Inhalte wie oben beschrieben
individuell verwalten.
In dem Sie auswählen, können Sie alle Termine und Wissensstände der
Klasse für einen ausgewählten Monat auf einem Blick sehen. Wählen Sie zusätzlich
aus um per drag and drop bereits erstellte Wissensstände einem
gewünschtem Datum hinzuzufügen. Wählen Sie um einen neuen Wissensstand
im Wissensstand-Manager für diese Klasse zu erstellen.
# Wissensstand Manager
Mit Hilfe des Wissenstand-Manager haben Sie unter anderem die Möglichkeit Ihre Lernumgebungen zu verwalten, diese den Schüler:innen zur Verfügung zu stellen und anschließend zu Bewerten.
# Allgemeine Bedingungen des Managers
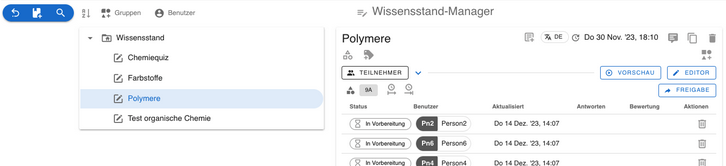
Nachdem Sie das Modul geöffnet haben, finden Sie eine Liste ihrer erstellten Lernumgebungen unter dem Bedienfeld „Wissensstand“. Sie haben auch die Möglichkeit nach Lernumgebungen zu suchen oder eine neue zu erstellen . Des Weiteren besteht die Möglichkeit die Liste nach bestimmten Kriterien zu sortieren . Oben links im Arbeitsfeld können Sie auswählen, ob alle erstellten Wissensstände angezeigt werden oder nur die, welche mit bestimmten Gruppen oder Benutzer:innen geteilt wurden. Wählen Sie hierfür das entsprechende Symbol aus.
# Verwaltung der Wissensstände
Wenn Sie einen Wissensstand auswählen, öffnet sich auf der rechts neben der Liste ein Fenster indem Sie alle Informationen dieser einsehen können.
Sie haben die Möglichkeit die Lernumgebung zu testen, indem Sie
auswählen. Des Weiteren können Sie diese unter dem Punkt bearbeiten.
Wenn Sie die Lernumgebung den Schüler:innen freigeben möchten damit diese sie
bearbeiten können wählen Sie aus. Die Lernumgebung erscheint dann allen
hinzugefügten Schüler:innen im Modul „Wissensstand“. Ob Sie eine Lernumgebung
freigegeben haben, erkennen Sie auch an den folgenden Symbolen der Statusanzeige, die
sich vor den jeweiligen Namen der Teilnehmenden befindet:
- in Vorbereitet (die Lernumgebung erscheint nicht bei Schüler:innen)
- Freigegeben (die Lernumgebung erscheint bei den Schüler:innen)
Sobald die Schüler:innen die Lernumgebung bearbeitet haben, erscheint unter dem Punkt „Aktualisiert“ Datum/Uhrzeit der Bearbeitung sowie unter „Antworten“ Die Anzahl der gelösten Aufgaben. Außerdem finden Sie nun unter Aktionen den Auswahlpunkt „bewerten“ .
# Bearbeitungszeitraum einstellen
Sie haben die Möglichkeit festzulegen wann die Schüler:innen die Lernumgebung
bearbeiten. Mit Hilfe der Auswahl der Symbole können die den Beginn und das Ende der Bearbeitungszeit einstellen (Datum/Uhrzeit).
# Wissensstände bewerten
Um einen Wissensstand/Lernumgebung bewerten zu können, wählen Sie das Symbol
unter Aktionen aus.
Es erscheint ein Fenster, aus dem Sie einen Überblick über die zu bearbeiteten Aufgaben erhalten.
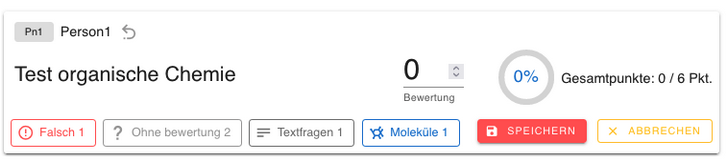
Indem Sie die entsprechenden Felder auswählen, können Sie die richtigen und falschen sowie Aufgaben ohne Bewertung, Textfragen und Moleküle einsehen.
Sie haben die Möglichkeit die Aufgaben zu kommentieren umso den Schüler:innen ein direktes Feedback zu geben. Wählen Sie hierfür die Frage aus und verfassen Sie einen Text im Bereich „Notiz“.
Bei „Textfragen“ und „Moleküle“ haben Sie zusätzlich die Möglichkeit einer individuellen Punktevergabe.
Nachdem Sie die Aufgaben analysiert haben, können Sie eine individuelle Bewertung vornehmen. Indem Sie auf „Speichern“ klicken, wird den Schüler:innen die Bewertung angezeigt. In der Übersicht der Lernumgebung im Wissensstand-Manager erscheint die Bewertung der Schüler:innen und zusätzlich das Symbol unter „Aktionen“.